Hi again! Autumn came, right? Well what we most need in such a season? An umbrella(i had this idea when I came out home earlyer without knowing it was raining :(( ). So let's see how we can make an umbrella. Not very detailed ... but at least we get used to some features of 3ds max.
1.First of all start by creating in the Top View a sphere with a Radius of 100 units.

2. Then go to the Modify panel and change the number of Segments to 18 and Hemisphere to 0.625.

3. Convert the object to an Editable Poly (Right click > Convert To > Convert to Editable Poly).

4. Go to Polygon mode (shortcut key: 4), select all bottom polygons and delete them.

5.Switch to Edge mode (shortcut key: 2). In the Top View select the 9 edges highlighted in the image above.

6. Hit the Loop button to extend the current selection.

7. Press Ctrl and click the Vertex mode button. This will switch to Vertex mode and select all vertices that define the previously highlighted edges.

8. Scale the selected vertices (uniform scale, on all three axis).

9. Back to Edge mode, repeat the selection process this time with the edges that were previously unselected. Select the edges as shown above, then hit Loop to extend the selection. Chamfer the selected edges 0.01 units.

10. Select one of the bottom edges and hit Loop to extend the selection.

11. Chamfer the selected edges 0.01 units.

12. Add a MeshSmooth modifier from the modifiers list.

13. Set the Iterations to 3.

14. Since our geometry only has top surface, add a Shell modifier.

15. Set the Inner Amount to 0.1 and the Outer Amount to 0.

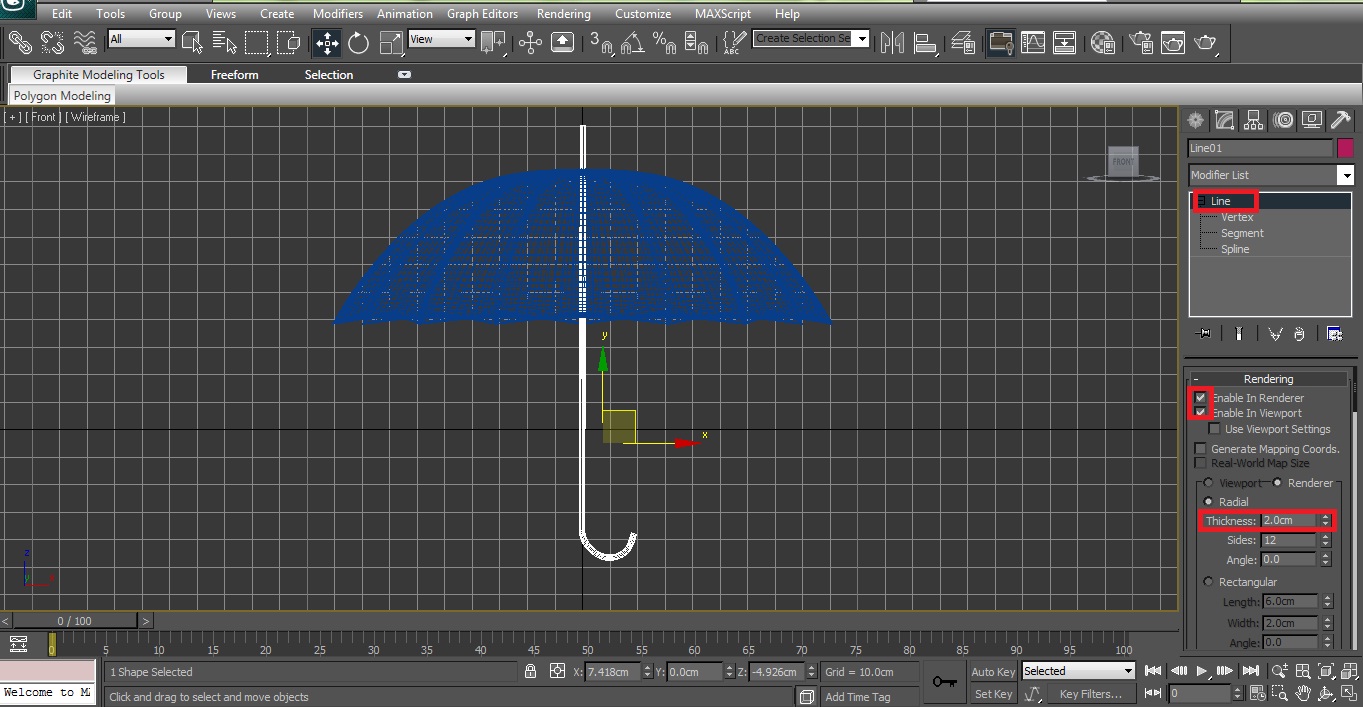
16. To create a quick handle you can use a basic line. Draw a line of 4 points.

17. Then go to vertex mode, click on the middle vertex of the handle, go and hit fillet option. With the cursor over the selected vertex draw up a little to share that vertex in two vertex.

18. Then we expand the Rendering option from Modifyer Panel and check "Enable in rendering" and "Enable in view port". And set the thickness to 2 cm.
19. Now the image is perfect for rendering. So.... this is it!
