For every Christmas season, Christmas Balls is one of the most commonly used decor for many houses around the world. It's beauty and elegance helps bring abundant christmas spirit and joy to every family. This tutorial will show you how to create a Christmas Balls and hopefully inspire every one to have a good feeling and blessings this Christmas. It's very easy to create it.
Step 1: Create a Sphere in Top view with radius of 14 and 18 segments. Rename it to "Bubble".

Step 2: Right click on the bubble object and convert it to Editable Poly.
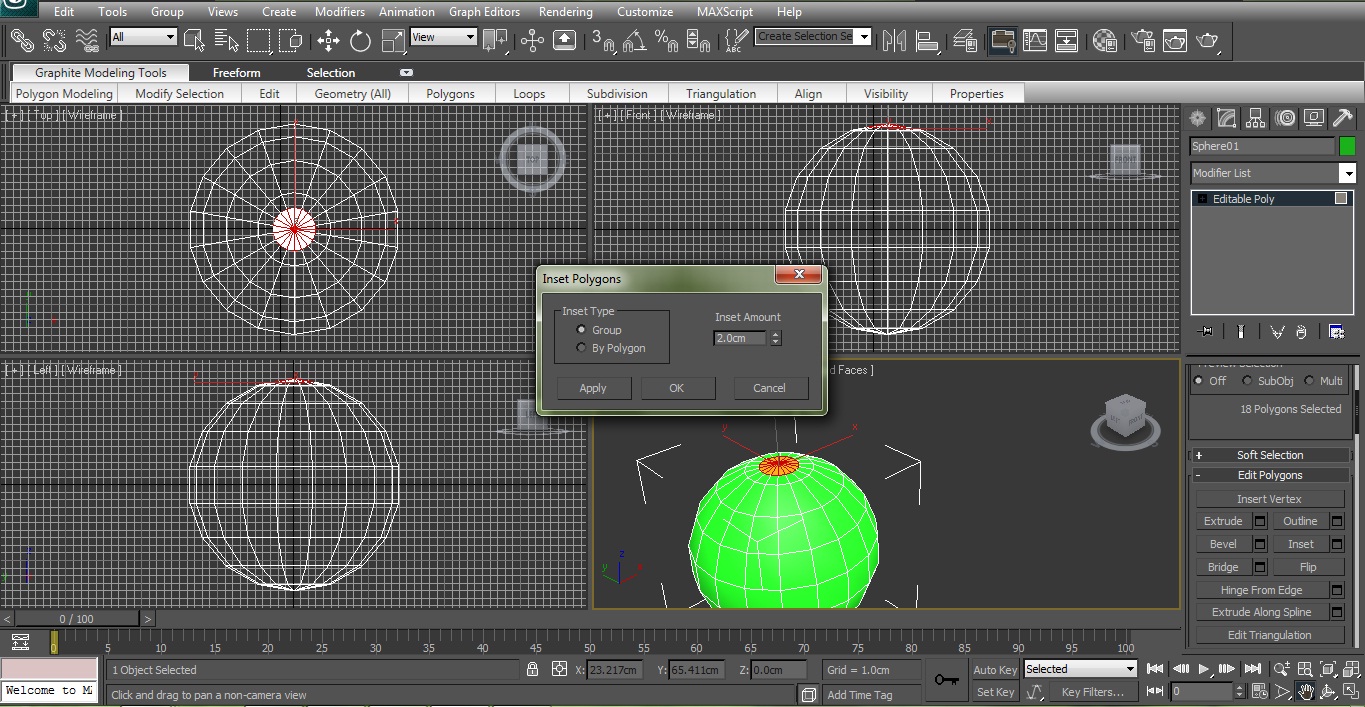
Step 3: Select the top polygons and hit Inset button in editable poly modifier. Change amount of Inset to 2 and hit OK.
 Step 4: Click on Extrude button in Editable Poly modifier and change its Height to 0.2 and hit Apply and then again change its Height to 4 and hit OK. Now you can delete the top polygons.
 Step 5: Apply TurboSmooth modifier to the bubble object. In turboSmooth parameters increase Iterations field to 2 and make sure Isoline Display is checked.
 Step 6: Create a Cylinder in Top view and rename it to Cap. Make sure its settings is same as below picture.
 Step 7: Right click on the Cap object and convert it to Editable Poly.Step 8: Select the middle vertices and with Scale tools move them out and let them be near to border of Cap.
 Step 9: Select every third one of the bottom polygons same as below picture.
 Step 10: Extrude selected faces with Height of 2.5.
 Step 11: Apply TurboSmooth modifier to Cap object. Then you can reshape your Cap object as you like. I have added some more faces at top and make a curvy shape there.
 Step 12: Finally create a hooky shape at top of the Cap. You can use Circle shape or Torus geometry. I used circle and using Select and Move tool I Positioned like in the picture.
 Finally, attach it to the Cap object.
Well, the Bubble object is already created. You can make several copies and arrange them in your scene. Use the previous tutorial for rendering the christmas balls whenever you wish.
This is my final result! Hope you like it!


Step 2: Right click on the bubble object and convert it to Editable Poly.
Step 3: Select the top polygons and hit Inset button in editable poly modifier. Change amount of Inset to 2 and hit OK.


Well, the Bubble object is already created. You can make several copies and arrange them in your scene. Use the previous tutorial for rendering the christmas balls whenever you wish.
This is my final result! Hope you like it!

Niciun comentariu:
Trimiteți un comentariu